Friday, 24 October 2014

Buttermilk Pancakes

I got up this morning with an intense craving for pancakes. So I turned to my trusted kindle and browsed America's Test Kitchen's cookbooks because that's what I turn to when I want the best, foolproof recipes. Yes, they really are foolproof. I came across a recipe for buttermilk pancakes which I love because of the subtle tanginess and I have found that the buttermilk and baking soda just gives the pancakes greater rise. 

The pancakes were very easy to prepare and the flavour far surpasses any box pancake mix you can possible buy. There is additional fat by way of soured cream and that produces more flavour. The secret to perfect pancakes is to let the batter rest. This allows the batter to thicken slightly which aids pancake formation. So what you'll end up with is picture perfect pancakes. Top with a little salted butter and maple syrup and voila....heaven. If you are pinched for time then why not mix the dry ingredients and set aside and morning of mix the wet ingredients then combine? Easy peasy! Please consider from scratch cooking the next time your hand reaches for the banal frozen pancakes or pancake mix. Try this recipe, you will not regret it and enjoy!

Best Buttermilk Pancakes (recipe from The Cook's Illustrated Cookbook)

2 cups (10 ounces) all purpose flour
2 tablespoons sugar
1 teaspoon baking powder
1/2 teaspoon baking soda
1/2 teaspoon salt
2 cups buttermilk
1/4 cup sour cream
2 large eggs
3 tablespoons unsalted butter, melted and cooled
1-2 teaspoons vegetable oil (I used butter)

1. Adjust oven rack to middle position and heat oven to 200 degrees (farenheit). Spray the wire rack set in rimmed baking sheet with vegetable oil. Whisk flour, sugar, baking powder, baking soda and salt together in a medium bowl. In second medium bowl, whisk together buttermilk, sour cream, eggs, and melted butter. Make a well in centre of dry ingredients and pour in wet ingredients; gently stir until just combined (batter should remain lumpy, with just few streaks of flour). Do not overmix. Let batter sit for 10 minutes before cooking.
2. Heat 1 tsp oil in 12inch nonstick skillet over medium heat until shimmering. Using paper towels carefully wipe out oil on bottom and sides of pan. Using 1/4 cup measure, portion batter into pan in 4 places. Cook until the edges are set, first side is golden brown, and bubbles on surface are just beginning to break, 2 to 3 minutes. Using thin, wide spatula, flip pancakes and continue to cook until second side is golden brown, 1 to 2 minutes longer. Serve pancakes immediately, or transfer to wire rack in preheated oven. Repeat with remaining batter, using remaining oil as necessary.


Saturday, 11 October 2014

Remembering My Grandmother

Hi all, it's been a while since my last blog post but I am back and hopefully will post some more soon. My son started nursery and his adjustment has been great but the downside of it is that we both got the flu twice since he started. My husband was spared, he believes in oregano oil and ginger tea and I guess it works.

So with flu season in mind my post today is on chicken soup which brings me back to my paternal grandmother, Jasmine. She is no longer here with us but she was such an inspirational woman in my life. She was a real mother in every sense - humanistic, nurturing, gentle and loving. She also always had a set menu of everything she would cook for that week and one of her specialties was her Monday soup made with beef and beef bones and vermicelli. This soup was so comforting and it was the panacea for sick mouths. I have made mine with chicken because it's what I had on hand and I wanted mine to be a little lighter.

This is a basic recipe but feel free to improvise and add any other vegetables you wish. You can also make this soup with beef instead of chicken, and if doing so then use beef stock instead of chicken. I left the skin on the chicken because I find the fat adds more flavour. Don't skimp on fresh seasoning either, especially celery as that imparts flavour. You can garnish with fresh flat leaf parsley at the end of cooking, I used scallions because that's what I had on hand but parsley would be excellent. So enjoy this heirloom recipe and share with those in your family who may be down with the flu.

Chicken Noodle Soup

2 chicken breasts on the bone with skin
1 large carrot cut into large chunks
2 stalks of celery chopped into large chunks
1 medium onion chopped
4 cloves of garlic minced
2 tbsp finely chopped thyme leaves
3 tbsp finely chopped parsley or scallions or both
2 cups of chicken broth and 4 cups of water
3 medium potatoes cut into cubes
frozen corn kernels (about 1/2 cup)
1/2 cup of vermicelli pasta (you more if you wish but bear in mind it will thicken the soup)
salt and pepper flakes
Extra virgin olive oil


1. Saute the onions and garlic in the olive oil over medium heat. Add the chicken breasts with the vegetables, thyme, stock and water. Season with salt and chili flakes. Bring this to a gentle boil then reduce to a gentle simmer. Cover the pot and simmer for 25 minutes.
2. Once the time has elapsed remove the chicken breasts and carefully cut the breast meat off the bone into chunks. Add the chicken, frozen corn, scallions and vermicelli and over the pot for another 5 to six minutes until the pasta is cooked. Garnish the soup with additional herbs if you wish. Taste and adjust for seasoning.


Thursday, 29 May 2014

Coconut Bundt Cake

Today I was in the mood for baking and one of the goodies that I like to bake is bundt cakes. I recently purchased this book called "One Bowl Baking: Simple, From Scratch Recipes For Delicious Desserts" and I have to admit I became hooked on the premise. It basically is from scratch baking but doing it simply with just one bowl. So not such a big mess and definitely fewer steps. That's never a bad thing.

Coconut is one of my favourite ingredients. I adore in both savoury and sweet applications. If I visit a sweet shop or Patisserie I always have a predilection for anything with coconut. Coconut cake is quite possible one of the best cakes every invented and today I made a really simple one but with huge results. This cake was ultra moist, not overly sweet and full of coconut flavour. There is a chocolate pound cake recipe that I have my eye on so look out for the post on that one.

Get this book and don't let the simple title fool you. This one is a treasure of yummy baked goods. I highly recommend it to the busy mums who try to cook from scratch. It's a keeper. Enjoy!

Glazed Coconut Bundt Cake (recipe adapted from "One Bowl Baking: Simple, From Scratch Recipes For Delicious Desserts by Yvonne Ruperti)

Cake Batter:
20 tbsp unsalted butter, softened, plus more for greasing the pan
1 3/4 cups plus 2 tbsp granulated sugar
3/4 tsp salt
3 large eggs
1 1/4 cups coconut milk
1 cup shredded sweetened coconut
1 tbsp vanilla extract
2 1/2 cups cake flour plus more for dusting
2 1/4 tsp baking powder

Glaze:
1 cup confectioner's sugar, sifted
2 tbsp full fat coconut milk
1/3 cup shredded sweetened coconut

Place an oven rack in the middle position. Preheat oven to 350. Butter and flour a 12 cup bundt pan.

To make the cake: In a large bowl, whisk the butter, sugar, and salt until creamy.
Whisk in the eggs, one at a time, until each is incorporated.
Whisk in the coconut milk, coconut and vanilla.
Add the flour and baking powder to the bowl, then stir until just combined.
Spoon the batter into the pan and bake until golden, just firm and a toothpick inserted into the centre comes out clean, about 40 to 45 minutes.
Set the pan on a wire rack to cool for about 30 minutes, then remove the cake from the pan to cool completely before glazing.

To make the glaze: Stir the sugar and coconut milk together in a bowl until smooth. Spoon over the top of the cooled cake, letting the glaze drip down the sides. Sprinkly the coconut over the top.


Saturday, 24 May 2014

Chicken Shawarma Wraps

This is my kind of food. Bright, colourful and bursting with the gentle fragrance of spices contrasting with the coolness of the yoghurt garlic sauce. I firmly advocate preparing food from scratch and today I did just that. I decided on an Arabic supper so I prepared wraps, chicken shawarma, Arab salad and garlic cilantro yoghurt sauce. It may seem laborious but it actually didn't take that long to prepare as I prepped the chicken the day before as well as the sauce.

The important thing to note when making Arabic food is that marinating enhances the flavour of the spices. Yoghurt aids in tenderising meat as well. So plan a full day ahead of time when preparing this meal. I also find the salad should be made right before the meal as salting it makes the vegetables sweat. You can however dice all the veggies beforehand then season right before eating the meal. As always I don't really like to give a specific recipe but a guide. Feel free to add as much or as little spice as you wish.

So this is my gift to you if you adore mystery meat gyros but want a healthy option then try this recipe for chicken shawarma. It will get rave reviews. This one is a feast for your taste buds yet your health will benefit from it as well. Enjoy!

Chicken Shawarma (serves 4)
4 boneless skinless chicken breasts
Spice mix (recipe follows)
Scant 3/4 cup yoghurt (full fat)
8 cloves garlic finely minced
2 tbsp extra virgin olive oil
Sea salt and pepper to taste

The night before you plan to make this marinate the chicken. Toss the chicken with the spices and season with salt and pepper or chile flakes. Add the yoghurt and olive oil and give it a good toss. Place the chicken in a non reactive bowl ( my preference is glass) and cover with kling wrap. Marinate this overnight at least in the refrigerator.

1. Preheat the oven to 350.Take the chicken out of the refrigerator and let it come to room temperature.
2. Once the chicken is at room temperature place it in the oven and bake for half an hour. After baking leave the chicken in the dish to cool down completely. This step is very important.
3. Slice the chicken across the grain into thin slices and toss it gently in the roasting juices. Preheat a nonstick skillet to a medium high heat.
4. Coat the skillet with about 2 tablespoons of extra virgin olive oil . Once the oil is hot enough add half the chicken to the pan. Don't overcrowd the pan as this impairs it from browning and crisping up. Once the first set is browned add the rest until you have cooked all the chicken a second time.

Assemble your wraps now. Place some chicken in the wraps then some salad then drizzle with the garlic sauce . Enjoy!

Spice mix:
3 tbsp coriander seeds
1 tbsp cumin seeds
5 whole green cardamoms
1 tsp ground cinnamon
1 tsp ground allspice
1 tsp ground ginger
2 tsp hot smoked paprika or to taste

Heat up the whole spices in a pan until you start to smell their fragrance. Grind in a coffee grinder then add the ground spices. Whisk to combine thoroughly.

Arab Salad
2 medium tomatoes diced
2 medium cucumbers diced
1 small onion (red preferably) diced
1 bunch of Italian flat leaf parsley finely chopped
Juice of 1 lemon or to taste
Extra virgin olive oil to taste
Salt and pepper to taste

Toss everything together in a non reactive bowl.

Wraps (adapted from Paul Hollywood's "How To Bake")
I used this recipe and it yielded 10 wraps

500g strong white bread flour plus more for dusting
10g salt
30g caster sugar
30g extra virgin olive oil
320ml cool water (tap water)

1. Tip the flour into a large mixing bowl and add the salt and sugar to one side of the bowl and the yeast to the other. Add the olive oil and 3/4 of the water, and turn the mixture round with your fingers. Continue to add water a little at a time until you've picked up all the flour from the sides of the bowl. You may not need to add all the water, or you may need to add a little more - you want dough that is soft, but not soggy. Use this mixture to clean the inside of the bowl folding the edges into the middle. Keep going until the mixture forms a rough dough.
2. Tip the dough onto a lightly floured surface and knead well for 5 - 10 minutes. Do not add too much flour to your surface as this will make the dough too dry.
3. When the dough feels smooth and silky, put it into an oiled large bowl. Cover with a tea towel and leave to rise until at least double in size - at least 1 hour, but it's fine to leave it for 2 or even 3 hours.
4. Dust a work surface lightly with flour and tip the dough onto it. Fold it inwards repeatedly until all the air is knocked out and the dough is smooth. Divide into 10 pieces.
5. Preheat the broiler and place rack on the first shelf in the oven. Working one piece at a time roll the dough into a ball with your hands then roll it out as thin as possible with a rolling pin. Place one wrap at a time on a baking sheet and broil the dough for 1 minute per side. I broiled my first few for 2 minutes on 1 side and 1 minute on the next but I found that wrap got crispy which was lovely but not suitable for wrapping.


Monday, 31 March 2014

Bar b que Chicken Pizza

I am already aware the Italians would cringe and scoff at me for this recipe. However, good food is good food and sometimes good food is "trashy". Bar b que chicken pizza is one of those foods. Sweet sticky bar b que sauce with roasted chicken, red onions, mozzarella and a flourish of fresh herbs in the form of parsely and cilantro.

I got the recipe for the pizza dough from Everyday Food and I think it's brilliant because it contradicts everything the pizza pundits chant. For one, this dough is ready in 1 hour which is a winner in my eyes and it uses an abundance of olive oil (always a good thing) and it essentially means you can make pizza when you get that pizza whim. Nowadays the body of knowledge of pizza making is exhausting and it leaves you feeling like an idiot if you don't line your oven with quary tiles or try your hardest to create that perfect crispy crust. I say to hell with all of that rubbish! You can make a perfectly respectable dough using this recipe and you will end up with a very crispy crust and a delicious pizza. So fear not, take courage and create your own pizza...the possibilities are endless.

So for this recipe I chose bar b que chicken as my topping but I can be here for hours suggesting toppings. Why not try a lamb merguez/mozzarella topping or go with something traditional like tomato sauce, basil and parma ham. Or you can go vegetarian if so inclined and create a spinach, garlic and mozzarella pizza. Your palate and imagination will be your guiding light but what I gift you with is a wonderful, dependable and most of all easy pizza dough. Enjoy!

Pizza Dough (adapted from Everyday Food)
1 packet instant yeast (10g)
2 tbsp sugar
1/4 cup extra virgin olive oil
2 tsp salt
1 1/2 cups warm water
4 cups all purpose flour

1. Whisk together the yeast, sugar, oil and warm water. Add one cup of flour then the salt and stir with a wooden spoon. Gradually add the rest of the flour until a very sticky mass of dough is formed. Don't be tempted to add more flour, this is a no knead dough so it's meant to be extremely sticky. Transfer dough to a heavily oiled bowl then cover with more oil then kling. Leave to rise for 1 hour after which you r dough will be ready to top. To shape dough simply divide the dough in half then press it out to desired thickness. I made 2 12 inch pizzas with this recipe.

Chicken Bar B Que Topping:
2 large bone in chicken breasts
2 stalks of green onions
3 cloves of garlic minced
1 1/2 cups bar b que sauce sweetened with sugar or honey to taste
1 large onion thinly sliced
Salt and pepper
8 ozs of grated mozzarella (not fresh)
Freshy chopped parsley (flat leaf Italian) and cilantro to your taste

Preheat oven to 425.
1. Season the chicken breasts well with salt and pepper. Add the scallions/gree onions which should be chopped as well as the garlic and bar b que sauce. Cover the dish with foil and bake for 25 minutes. After this time the chicken breasts will not be completely cooked but that ok. Let them cool completely then cube them and place them back into the bar b que sauce. Discard the chicken bones.
2. When ready to bake the pizza, top the pizza with the chicken and bar b que sauce. Bake for 10 minutes then top with the red onion slices. Bake for another 10 minutes then top with the cheese and bake for another 5 to 10 minutes. If  after all this time your pizza is not a nice brown colour simply preheat your broiler and broil pizza for no more than 2- 3 minutes. To garnish, top the pizza with the chopped herbs. Don't under utilize the fresh herbs, they give the dish a real fresh flavour.


Sunday, 23 March 2014

Icebox Cookies

Here is an addition to your cookie/biscuit collection. The convenience of these alone are worth the little effort it takes to prepare them. You can prepare your dough and bake it after a couple hours in the freezer or simply freeze it and slice and bake them when guests come round.

I have made this recipe from "Cook's Illustrated Holiday Baking". I highly recommend the Cook's Illustrated books or America's Test Kitchen series if you want to become a better cook. They are all about acumen and troubleshooting and their recipes are generally foolproof. I made my cookies with a cinnamon sugar variation but you can bake them plain or if you would like to do chocolate biscuits then simply reduce the flour to 2 cups and add to it 1/4 cup of sifted Dutch processed cocoa. Add 2 ounces of melted and cooled semisweet chocolate to the batter along with the yolks and vanilla. Enjoy!

Vanilla Icebox Cookies (recipe adapted from Cook's Illustrated Holiday Baking)

Ingredients:
2 1/4 cups unbleached all purpose flour
1/2 tsp table salt
16 tbsp (8oz) unsalted butter, softened but cool
3/4 cup granulated sugar
1/2 cup confectioner's sugar
2 large egg yolks
2 tsp vanilla extract

1. Whisk together flour and salt in medium bowl; set aside.
2. In bowl of electric mixer, beat butter and sugars at medium speed until light and fluffy, 1 to 1 1/2 minutes. Scrape the sides of bowl with rubber spatula. Add yolks and vanilla and beat until incorporated, 15 to 20 seconds. Add dry ingredients and mix at low speed until dough forms and is thoroughly mixed, 25 to 30 seconds. (Dough will be soft but not sticky. If dough is sticky, chill for 10 to 15 minutes).
3. Divide dough in half. Working with one half at a time, roll dough on clean work surface into log measuring about 6 inches long and 2 inches thick. Wrap each log in plastic and refrigerate at least 2 hours or up to 3 days. (Dough can be frozen up to 1 month. Wrap logs in plastic wrap then foil before freezing.)
4. Adjust oven racks to upper and lower middle positions and heat oven to 325 degrees. Line 2 large baking sheets with parchment paper or spray with nonstick cooking spray.
5. Unwrap dough logs one at a time and with sharp knife cut each dough in half, then into 1/4 inch slices. Place slices on baking sheets, spacing them 1/2 to 1 inch apart.
6. Bake until edges begin to brown, about 14 minutes, rotating baking sheets front to back and top to bottom halfway through baking time. Cool cookies on baking sheets for 2 minutes then transfer to wire rack with wide metal spatula.

Variation : Cinnamon Sugar Icebox Cookies
Save the egg whites when separating eggs for the dough. Follow the recipe brushing the chilled logs with the beaten egg whites. Roll logs in mixture of 3 tbsp sugar and 2 tsp ground cinnamon.


Sunday, 9 March 2014

Arabesque Braised Beef

Sunday lunch is always a conundrum as to what to serve. Lately, I have been revisiting some of my beloved Middle Eastern cookbooks. My prized possessions are Claudia Roden's New book Of Middle Eastern Food, Recipes And Remembrances by Sonia Uvezian off the top of my head but I own many more.  What I adore about this type of cuisine is the gentle fragrance of the lightly spiced food. You can detect spices but somehow your palate is not overwhelmed by them.

So with that in mind my lunch table today was very arabesque. I prepared beef braised with carrots in a spice scented sauce and to partner with I prepared green beans with tomatoes. I felt the two worked magically as the tomato flavour of the beans complemented the spicy beef. I suppose this can be similar to a tagine or a khoresht but I felt that it really was neither of the two in the end. Not quite a tagine because I sometimes feel a tagine should also include nuts or fruit and definitely not a khoresht because of the absence of dried limes and saffron. However, what it does have in common with the Moroccan and Persian stews is the technique. The fact that it is a braised dish and beautifully balanced with the right amount of spices.

This dish is a nice starting point for you if you are curious about Middle Eastern cuisine. Although I have posted a recipe I do hope you simply use it as a guide and try to improvise in whatever way you wish. For instance if you feel you want to add more of any of the spices then do. If you require more chilis then add. All you need to understand from the recipe is the technique. It is a braised dish which requires a small amount of liquid to cook the beef and a low and slow cooking time. I urge you to pair this dish with the grean beans and tomatoes and of course the quintessential side dish of the Middle East - basmati rice.

Arabesque Braised Beef

Ingredients:
2lbs cubed beef clod/chuck
1 large onion thinly sliced
6 cloves of garlic minced
1 large carrot sliced
2 tbsp extra virgin olive oil
2 red chilis (or to your taste)
Salt and pepper to taste
pinch of sugar
juice of 1 lime

Spice Blend:
2 tbsp coriander seeds
1/2 tbsp ground cardamom
1/2 tsp ground nutmeg
1 tsp ground allspice
1/2 tsp smoked paprika
1/2 tsp ground cinnamon
1 tsp ground ginger

Heat the coriander seeds in a dry skillet until fragrant then blend in a grinder with the other spices. Set aside.

To make the Beef:
1. Heat the oil in a fairly large pan over medium high heat. Add the onions and the garlic with a little salt. Add to the spice mixture about 3 tbsp of water and add that to the onion mixture.
2. Once the water has evaporated from the spice mixture then add the beef and saute. Season the meat well with salt and pepper and add about 1 cup of water. Add the carrots and bring the mixture to a boil. Once it has come to a boil reduce to a simmer on a gentle heat and let it cook for about 1 1/2 hours. Check the pot and stir it every 30 minutes or so. I doubt you would require more water - I didn't.
3. Once the meat is tender, turn off the stove and just let the meat sit until it is warm. Do not eat this dish piping hot as the flavours meld better as it cools. I did not have fresh chopped coriander which I usually garnish with but I urge you to garnish with it as the coriander further enhances the flavour of the dish. Enjoy!

Green Beans With Tomatoes
Ingredient:
1/2 lb green beans ( I always cut mine in half lenghtways)
4 medium tomatoes chopped
1 medium onion sliced
4 cloves of garlic minced
salt and pepper to taste
pinch of sugar
2 tbsp extra virgin olive oil

Heat the oil in a pan over a medium heat then add the tomatoes, onions and garlic. Let this mixture cook for about 10 minutes adding salt, pepper and a tip of sugar to reduce the acidity of the tomates. Once the tomatoes have softened and released their liquid add the green beans and more salt to taste. Let this cook for a further 10 minutes or until the beans are soft enough for your taste. Enjoy!


Tuesday, 4 February 2014

Fork Biscuits

We live in a very different world today. There is all this talk of GMO foods, pesticides, organic, natural etc that I think can send a mother crazy. Anxiety rises as to what snacks to feed my child. I obviously want him to be as healthy as possible but at the same time he is a growing child that needs to enjoy life. Eating should be pleasurable so I think it's about allowing my child to snack but mostly on snacks I prepare for him.

I always feels if we eat food that is as "real" as possible then that's the ideal. What I mean by real is to limit genetically modified foods. Those are foods derived from sugar (created from gmo beets), soy and corn. So I choose sugar derived from cane and olive or coconut oil instead of vegetable soy based or corn oil. These genetically modified ingredients are actually quite common in processed foods. So for example if you buy a packet of your favourite chocolate biscuits chances are they were made with corn syrup and vegetable oil. Don't get me wrong, we can't totally abstain from these foods because we may have the occasional snack with it but we can certainly try our best to prepare our own snacks.

So this brings me to my recipe today which is fork biscuits. I make these frequently for my son, and you would too if you knew how simple they are. Three ingredients : caster sugar, flour and butter. Did I mention how fast it's made? Try 15 minutes to prep then about that same time in the oven. So even if you are a busy mum you can always spare the time to make this scrummy biscuit. Enjoy!

Fork Biscuits (Recipe from Mary Berry's book Mary Berry's Ultimate Cake Book 2nd edition)
4 oz(100g) butter softened
2oz (50g) caster sugar
5 oz(150g) self rising flour

Preheat oven to 180 degrees celcius/350 degree F/gas4. Lightly grease 2 baking trays.
Measure the butter into a bowl and beat with a wooden spoon. Gradually beat in the sugar and then mix the flour. Bring the mixture together with your hands to form a dough. Form the dough balls about the size of a walnut and place on the prepared baking trays. Dip a fork in a little water and use this to flatten the biscuits.
Bake in the pre-heated oven for about 15 - 20 minutes or until very pale golden. Lift off baking tray and leave to cool completely on wire rack.

A note on a few adaptions I made. I added vanilla extract to the dough and I chilled my dough so as to avoid over spreading in the oven.


Monday, 6 January 2014

Happy New Year!

I know it has been a while since my last post, but I was so busy for Christmas with all it's festivities. I sincerely wish all my readers had a wonderful Christmas and wish you all a very happy, healthy and successful New Year. I hope we all stick to our goals and resolutions for this new year and that everyone feels a sense of achievement at the end of it. I know one of my goals is to write on this blog more frequently. So until then, be safe and enjoy life.

Monday, 18 November 2013

Bagels

As I have stated before I am an avid recipe hoarder. I scour books, magazines, television and the internet for ideas and recipes. If you look at my section on the blogs I love, you will see a link for foodwishes. I can't live without foodwishes, really I can't. I may be sounding a tad dramatic but I really am entertained by the wit, humour and expertise of chef John. I started watching his youtube series a few years ago and have been a fan since.

So today, I attempted bagels which I had never made before. I love bagels but they need to be really fresh and crusty on the outside but soft on the inside. This recipe delivered that and the added bonus is that the bagel tastes divine the next day as well. I saw chef John's video a few weeks ago and decided I needed to try his bagels which were San Fransisco style bagels. He explained that these are different from the conventional bagels in that they were less dense and lighter. They are also less calorific than the conventional type bagels which is never a bad thing. The other incredible point about this bagel making process is that it is easy! Actually, I would say it's almost foolproof as are most of chef John's recipes.

So I urge you to take an adventurous step and prepare some fresh, home made bagels. This will be your go to recipe for bagels..seriously. Enjoy!


The recipe for the bagels can be found here :


Tuesday, 8 October 2013

Da'ud Basha

As you can see in my profile information I mentioned that one of my favourite cuisines is that of the Middle East. I have a predilection for the use of spices in cooking. I love the fragrance of spices such as cardamom, coriander, cinnamon and cloves. That being said, I am also a huge fan of Indian food but I find that with Middle Eastern food the level of spice is just enough. Subtle enough that you get just the hint of it without feeling overwhelmed by spices as you can sometimes feel with Indian food.
Now I have learnt a few things about authentic Indian food so let me say in defense of Indian food that I believe it is the West's perception of Indian food that created the polemic of it being overtly spicy. There are numerous regions in India where spice is very muted, such as the cuisine of the Nawabs in Lucknow. However, generally speaking one does associate Indian food with being highly spiced. So I tend to find that Middle Eastern food is a good nexus between overly spicy and not at all.

So today I prepared Da'ud Basha named after the first governor of autonomous Lebanon. He was not however Lebanese but Armenian and it is claimed that this dish was very endearing to him. It is the Middle East's answer to meatballs, spiced well seasoned ground lamb meatballs with pine nuts served in tomato sauce. I serve this dish with vermicelli rice but you can serve it plain steamed basmati rice. Remember to always have plenty of fresh coriander on hand when preparing this dish as the freshness of the herb elevates the flavour of it.

Da'ud Basha
12 oz fresh ground lamb
4 cloves of garlic chopped
Scant 1/2 cup chopped coriander
1 egg yolk
2 tbsp coriander seeds
2 tsp cardamom seeds
1/2 tsp cumin seeds
1 tsp ground allspice
Salt and chili flakes (or finely chopped chili)
Extra virgin olive oil

1. Place the spices into a dry skillet and toast them until you start to smell their fragrance. Place into a spice grinder and grind until fine. Alternatively, if you do not own a spice grinder you can simply grind the spices with a mortar and pestle.
2. Place the ground lamb into a bowl and add to it the spices, salt and chili pepper to taste and the garlic and coriander. Leave this to marinate for at least 2 hours or overnight.
3. On the day of preparing the meatballs, place the lamb mix into a food processor along with the egg yolk. Process until the mix forms a rough ball. Gently form meatballs about golf ball size.
4. Brown the meatballs with a little bit of olive oil in a nonstick skillet over medium high heat. The pan has to be hot enough to really brown the meatballs. You are not cooking them fully, just browning the. Set aside and prepare the tomato sauce.

Tomato Sauce:
Ingredients
2 cups chopped fresh or canned tomatoes
1/2 cup finely chopped onions
4 cloves of garlic chopped
Chili pepper chopped
Currants about 3 tbsp or to taste
Toasted pine nuts same as currants or to taste
Fresh chopped coriander
Olive oil

1. Heat a skillet to medium heat and saute the onions and garlic in olive oil for about 5 minutes or so. Add the tomatoes with about 1/2 cup of water and saute for about five minutes stirring all the time. Cover the pan and let the tomatoes simmer for about 1/2 hour. You can add the currants and pine nuts to the tomatoes during that time.
2. Taste the tomatoes and adjust the seasoning, I always add a pinch of sugar to sweeten the tomatoes acidic taste. Place the meatballs into the tomatoes and simmer them for about five minutes or until cooked through. Be careful at this point, you do not want the meatballs to overcook and toughen. Garnish with fresh chopped coriander and serve with rice.

Vermicelli Rice
Scant 1/2 cup vermicelli broken into small pieces
11/2 cups basmati rice washed
Extra virgin olive oil or butter or a combination of the two
Salt and chili flakes

1. Saute the vermicelli until browned but not burnt in some olive oil or butter or the combination of the two. Add the rice and saute well for about 1 minute then add 2 cups of water. Let the water come to a boil and add salt and chili flakes and cover the pan with foil.
2. Set the pot on the lowest heat possible on your hob and leave the rice to steam for about 14 minutes. Once this time has elapsed uncover the rice and stir with a wooden spoon gently. Add melted butter for extra flavour if you wish.
Enjoy!


Thursday, 3 October 2013

Roasted Red Pepper Pesto

My love for  Mediterranean cuisine stems from it's simplicity. I believe I heard a quote once from Julia Child stating that Italian food was sometimes, too simple. Well one man's meat is definitely another's poison because it is the very simplicity of Italian food that I adore.

Take for instance humble ingredients such as basil, pine nuts, parmesan, garlic and olive oil. You pound it all up and the world is gifted with pesto. Pesto that probably to the annoyance of the Italians has ended up taking starring roles in that cafe bought chicken sandwich, the gourmet soup in an upscale restaurant and even simply bought from the supermarket ready to be tossed with linguine. What was meant as a means to utilize the fruits of the land became Italy's largesse to the world. And what would we do without it?

So today, I picked up fresh basil, parsley and sweet peppers and decided our fridge needed to be stocked with some roasted red pepper basil pesto. Again, that's the beauty of the gift of pesto the Italians gave us. They gave us the dish but also a method in which to create a myriad of flavours. The classic is great but why not enhance it and put your own signature on it? So I have chosen this combination because I love the sweetness of the charred peppers infused with that unmistakable fragrance of the basil. This is superb on a crostini for a starter or simply snacked on with some crusty bread. Beware, its addictive and you will not be able to avoid gobbling it all up. Might I also add, it's a scrummy gift to give to family or friends. Enjoy!

Ingredients
2 meaty red bell peppers (large)
Extra virgin olive oil
2 cloves of garlic chopped
1 scant cup basil leaves
2 tbsp chopped parsley
salt and chili flakes
Parmigiano reggiano cheese finely grated

1. Preheat your broiler. Once preheated, rub the peppers with oilve oil and broil them for about 15 to 20 minutes until their skins turn black. Place them into a large bowl and cover with plastic wrap. Allow the peppers to cool slightly then peel the skins off of them. It is important that the peppers stay relatively warm while you make the pesto as this allows them to break down easily.
2. Place the peppers into a food processor along with the chopped garlic, basil and pesto. Add a splash of olive oil then process until it's the consistency you like. I like my pesto slightly chunky for texture. Pour the pesto into a bowl and add the grated cheese and more olive oil to taste. Season with salt and chili flakes.

To store this pesto place it into a jar with a lid and cover the pesto with a film of olive oil. This is allow to keep fresh for a few days.


Wednesday, 11 September 2013

Milk Bread

For the past few weeks the rain has been incessant. This kind of weather puts me into a baking mood, so I decided to bake Paul Hollywood's milk bread today. I love milk breads, the crumb is tender as opposed to the chewy texture of a bread made with water. I more often than not choose Italian loaves such as ciabtta or foccacia for my daily loaves but today I felt for the wholesomeness of milk bread.

So I am posting another recipe from Paul Hollywood's "How To Bake", my indispensable guide to bread and baking. I am a Great British Bake Off fanatic....to say the least but I will be posting more on that later. I sometimes hear Paul Hollywood's voice in my head whilst baking and have a good laugh. It usually expresses some sort of opprobrium but then I shake it off and think even Paul Hollywood would be inclined to like what I baked. Well...at least Mary Berry would.

So anyway, here is the recipe. Please give it a go and enjoy it as I enjoyed mine.

Milk Loaf (recipe from Paul Hollywood's "How To Bake")
500g strong white bread flour, plus extra for dusting
10g salt
25g sugar
10g yeast
30g unsalted butter, softened
320ml warm full-fat milk
olive oil for kneading

1. Tip the flour into a large mixing bowl and add the salt and sugar to one side of the bowl and the yeast to the other. Add the butter and three quarters of the milk. At this stage, move the flour around gently with your fingertips. Continue to add the remaining milk, a little at a time, until you've picked up all of the flour from the sides of the bowl. You may not need to add all the milk, or you may need to add a little more - you want a dough that is soft, but not soggy. Use the mixture to clean the inside of the bowl and keep going until it forms a soft dough.
2. Coat the work surface with a little olive oil, then tip the dough onto it and start to knead. Keep kneading for 5 - 10 minutes. Work through the initial wet stage until the dough starts to form a soft, smooth skin. When your dough feels smooth and silky, put it into a lightly oiled large bowl. Cover with a tea towel and leave to rise until at least doubled in size - at least 1 hour, but it's fine to leave it for 2 or even 3 hours.
3. Brush a 1 kg loaf tin with a little olive oil (or you can use melted butter).
4. Tip your dough unto a lightly floured surface. Fold it inwards repeatedly until all the air is knocked out and the dough is smooth. Then form it into an oblong by flattening the dough slightly and folding the sides into the middle. Roll the whole lot up - the top should be smooth with a join running along the length of the base. Put into the prepared tin, making sure the join is underneath. Dust the top lightly with flour and slash lengthways.
5. Put the tin inside a plastic bag and leave to prove for 1 hour, until the dough is at least doubled in size and springs back quickly if you prod it lightly with your finger. Meanwhile, preheat your oven to  210 C.
6. Bake for  25 minutes or until the bread sounds hollow when tapped on the base. Leave to cool, out of the tin, on a wire rack.

Tuesday, 10 September 2013

A Greek Classic

I peruse the internet frequently always searching for inspiration, new techniques and all the wonderful offerings it gifts me with. I once made a meal which I laughed about with my best friend because we prepared recipes from different media. One I prepared from a cookbook, the other was from watching a you tube video and the last was from a recipe off a blog. That's life in the 21st century summed up!

So anyway, I was scouring Food And Wine magazine website which I do often enough and I saw a recipe I just had to have. It was a recipe for kourambiedes, which for those not familiar with it is a traditional Greek cookie. I love this cookie and oddly enough, I have never made it yet. I think it's probably because I just end up making French sable cookies or shortbread when I have a hankering for something rich, tender and buttery. That is about to change though.

I have a great recipe for kourambiedes from one of my Greek cookbooks but it includes almonds and my niece has nut allergies so I have decided to go with the Food And Wine recipe. I recommend trying this cookie and storing them in an airtight tin. When you feel that 4 pm hunger pang come on have a cup of tea or coffee and a couple cookies. It should more than hold you out until dinner. 

Kourambiedes (recipe from Food And Wine's Grace Parisi)

2 sticks ( 1/2 pound) unsalted butter, softened
1 large egg yolk
2 tablespoons brandy
1 teaspoon pure vanilla extract
2 cups all-purpose flour
3/4 cup confectioners' sugar, plus more for coating
1/2 teaspoon baking powder
1/8 teaspoon ground cloves
Pinch of salt
In a large bowl, using a handheld electric mixer, beat the butter at high speed until light and fluffy, about 10 minutes. Add the egg yolk, brandy and vanilla and beat until smooth.
Sift the flour with 3/4 cup of the confectioners' sugar, the baking powder, cloves and salt. Add the dry ingredients to the butter mixture in 3 batches, beating at low speed just until smooth. Scrape the dough onto a large sheet of plastic wrap or wax paper and roll into a 2-inch log. Wrap and refrigerate until firm, at least 30 minutes or up to 3 days.
Preheat the oven to 325°. Line 2 heavy baking sheets with parchment paper. Unwrap the dough and roll it into a perfect cylinder. Cut it into 3 equal pieces. Slice each piece crosswise into 12 cookies and arrange them on the prepared sheets about 1 inch apart.
Bake the cookies on the top and middle racks of the oven for 20 minutes, or until golden on the bottom; shift the sheets from top to bottom halfway through baking. Let the cookies cool slightly on the sheets, about 15 minutes.
Pour confectioners' sugar into a large shallow bowl. Add the warm cookies in batches and heavily coat the tops and sides. Transfer to a sheet of wax paper that has been dusted with confectioners' sugar and let cool.
MAKE AHEAD The cookies can be stored in an airtight tin between layers of wax paper for up to 2 weeks.

These cookies were so buttery and favourful. The brandy flavour was redolent and I think it's a new favourite. Bear in mind that I am extremely gluttonous and impatient so I didn't wait too long for the dough to chill. I measured my cookie dough into tablespoonfuls and rolled them into balls then baked for 25 minutes.


 Perfect with afternoon tea or coffee. 


Sunday, 8 September 2013

The Iconic Italian Flatbread

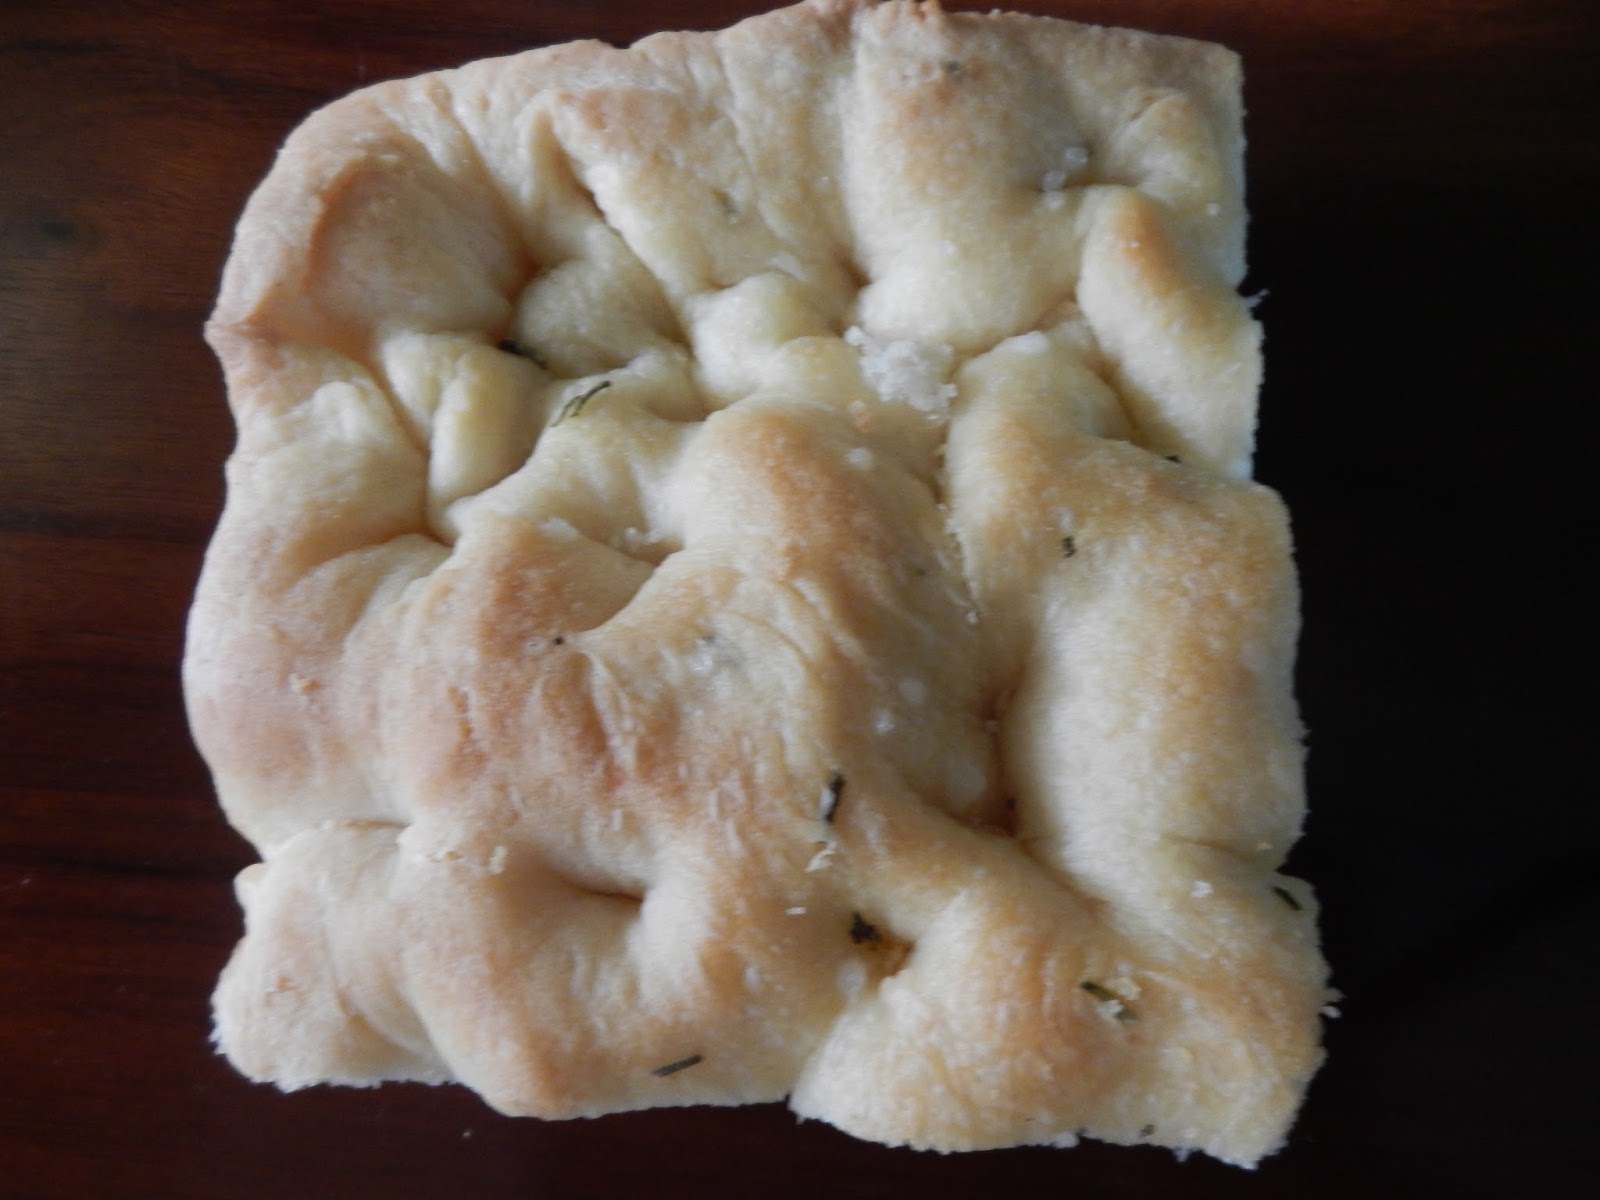
Today is Sunday, the day of the week I usually dedicate to bread making. I generally bake ciabatta but since I've commenced this blog I want to introduce my readers to more exceptional breads. Today I have chosen my indispensable recipe for rosemary foccacia.

A few years ago I purchased Michele Scicolone's Italian food Bible "1000 Italian Recipes". It has been a reference guide to regional Italian food ever since. Now bear in mind, I own many cookbooks to the point of an addiction. So I have my share of Italian cookbooks in my repertoire. I particularly adore Marcella Hazan's "Essentials Of Classic Italian Cooking" as it was my first cookbook on one of my favourite cuisines. My book is now worn and weathered but I can proudly affirm that it was an investment that yielded many returns. I am obsessed with most things Italian. In fact, I sometimes joke with my brother in law that I am Italian in soul at least.

Michele Scicolone's book was a joy to behold as it contained 1000 recipes! One of the first foods I tried from that book was the foccacia recipe and it is really reliable. It was a bit odd to find that it contained milk but as Scicolone explained the milk adds a tender touch to the bread's crumb structure. So what you end up with is a bread that will last a few days well without becoming tough and unpalatable. I make this recipe but without the added onions. Sometimes however, if I know the bread will be devoured in a matter of hours by company I will include the onions. So it's entirely up to you whether you want to include it or not. Either way, you're a winner.

This is the iconic flatbread of Italy and I think no other bread celebrates extra virgin olive oil as this bread. So remember to be liberal with the olive oil. I don't go to liberal on the rosemary as I find it is a very intense flavour. So if you appreciate rosemary then you can add more. When making the indentations to the dough always remember to indent the dough heavily with brute force. In fact I go all the way down to create holes all the way through. You will end up with very pronounced pebbling which I think is the hallmark of foccacia. This bread is wonderful hot or at room temperature. Good luck and enjoy!

Red Onion Focaccia Flatbread (from 1000 Italian Recipes written by Michele Scicolone.
1 envelope (21/2 teaspoons) active dry yeast or instant yeast
1/2 cup warm water(100 to 110 degrees farenheit)
1 1/2 cups milk, at room temperature
6 tablespoons olive oil
About 5 cups unbleached all purpose flour
2 tablespoons finely chopped fresh rosemary
2 teaspoons salt
1/2 cup coarsely chopped red onion

1. In a medium bowl, sprinkle the yeast over the warm water. Let stand until the yeast is creamy, about 2 minutes. Stir until the yeast dissolves. Add the milk and 4 tablespoons of the oil and stir to combine.
2. In a large heavy duty mixer or a food processor, stir together the flour, rosemary, and salt. Add the yeast mixture and stir until a soft dough forms. Knead until smooth and elastic, about 3 to 5 minutes. The dough will be sticky.
3. Oil a large bowl. Scrape the dough into the bowl and cover it with plastic wrap. Let rise in a warm, draft-free place until doubled, about 1 1/2 hours.
4. Oil a 13*9*2-inch baking pan. Scrape the dough into the pan, spreading it out evenly. Cover with plastic wrap and let rise 1 hour or until doubled in bulk.
5. Place the oven rack in the center of the oven. Preheat to 450 degrees farenheit.
6. With your fingertips, press down firmly into the dough to make dimples about 1 inch part and 1/2 inch deep. Drizzle the surface with the remaining 2 tablespoons olive oil and scatter the onion slices on top. Sprinkle with coarse salt. Bake until crisp and golden brown, about 25 to 30 minutes.
7. Slide the foccacia onto a wire rack to cool. Cut into squares. Serve warm or at room temperature. Store at room temperature wrapped in foil up to 24 hours.


This was the dough after it had proved for 1 1/2 hours. I stretched it into the oiled pan then left it to prove for another 45 minutes.

 The finished focaccia.


Rosemary focaccia sprinkled with coarse sea salt.


Monday, 2 September 2013

Cooking With Children In Mind

I am a mother to a two year old boy and I have to constantly create dishes which will appeal to his picky toddler palate. I am always met with much effusiveness when he is presented with potatoes, he adores potatoes in very form. A loaded potato with butter and cheese being his top choice followed by french fried and mashed.

Don't get me wrong, my son appreciates most foods. He is though a very small eater so he will eat most things I cook but in a very small amount. Given his predilections, I always try to expand his palate for other foods. I was pleasantly surprised to see him try sushi and eat it with gusto (cooked rolls that is). I made Indian food a few months ago and saw him devour chicken korma and naan even though I cooked with some heat that day. So that being said I am always amused when he partakes of whatever repast I create.

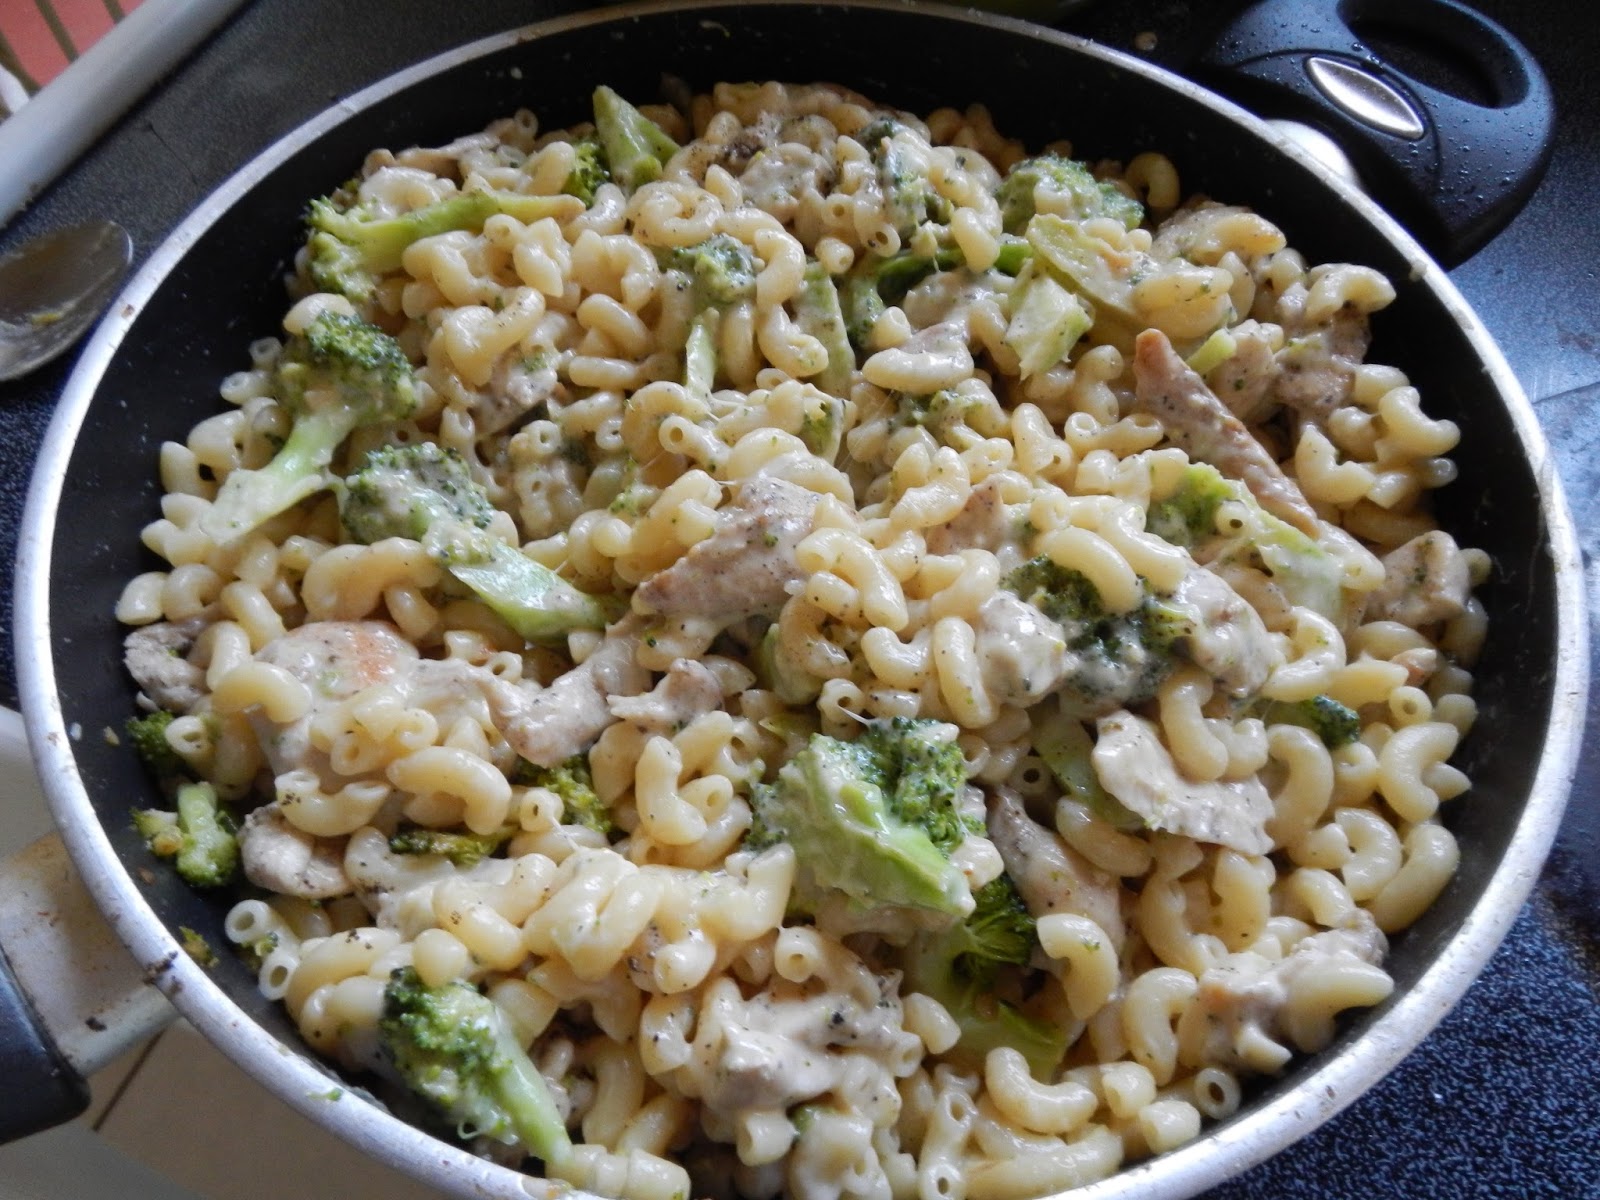
Yesterday I prepared pasta elbows with broccoli, chicken and cheese. I tried to cook it as healthy as I can meaning not in the alfredo style with lashings of cream. So i made it using a technique I always resort to when I want something with the unctuousness of an alfredo sauce but with a fraction of the calories. I achieve this by adding a touch of half and half or evaporated milk at the end of cooking. This makes the dish taste creamy without adding cream. There are many things you can add to the end of cooking that enhances the final dish. Sugar, salt, pepper, lemon juice, red wine vinegar, fresh herbs and cream or butter are the usual suspects. These all add that finishing touch to the dish and would have become lost had they been added at the beginning. Which is why cooking is a tasting process from start to finish.

So I hope this recipe will be of some use to mothers out there who constantly rack their tired brains with feeding options for their children. Believe me, the adults will enjoy it as well.

Elbow Pasta With Broccoli And Chicken

Now before I proceed bear in mind that this is a rough guide to preparing this dish. I have listed ingredients based on my taste so feel free to add or lessen according to your taste.

Ingredients
400g elbow pasta
3 boneless skinless chicken breasts
3 tbsp extra virgin olive oil
Salt and pepper to taste
1 cup mozzarella cheese (not the fresh one as it has too much moisture)
1 cup parmesan cheese ( I always use the real thing ..pamigiano reggiano)
6 cloves of minced garlic
2 bunches of broccoli cut into florets
1/3 to 1/2 scant cup of evaporated milk or half and half
Pinch of nutmeg
Chopped fresh herbs such as thyme or parsley

1. Cut the chicken into tiny strips and season well with salt and pepper. Heat a large pot of water to a rolling boil. Once water has come to a boil add salt liberally. Also heat a medium skillet over medium high heat. Once the water is boiling add the pasta and time it for about 8 to 9 minutes.
2. Once the skillet is heated to required heat saute the chicken in the olive oil. Try not to keep stirring the chicken so that it can get some time to brown properly.Once chicken is browned add the garlic and broccoli florets. Cover the pan and turn the heat down to medium low and let the mixture cook until the broccoli is the desired tenderness.
3.Before draining the pasta reserve some of the pasta cooking liquid. I always keep about a cup's worth. Once the pasta has been drained add it to the skillet with chicken and broccoli. Stir well and reduce the heat to low. Add the cheeses and black pepper to taste and add the dairy a little at a time until you like the consistency. Grate a bit of nutmeg and add a pinch of sugar and more salt if it needs it. You can also at this point add a little of the pasta cooking liquid. Taste and adjust seasonings until you are happy and enjoy!


One pot pasta elbows with chicken and broccoli.


Saturday, 31 August 2013

The Staff Of Life


It is said in the Arab world when a piece of bread falls on the ground it is quickly picked up and kissed and raised to heaven. Bread to many cultures is not only a staple but sacrosanct. I love bread, I can think of no better vehicle to sop up sauces and encase delicious fillings of meat, cheese etc.

We however live in a world where bread is vilified. Everything ranging from added "empty" calories, gluten allergies and high carbohydrate servings are the driving factors behind transforming something holy to a behemoth. I am sorry but I refuse to believe that a food which humanity has indulged in for centuries is evil. There were times in our progress as humans that all we survived on was bread. It has seen us through wars and continues to comfort and nurture us till today. Every culture has it's own form of bread - bread is not just food, it is history. Should we throw away history because of a passing fad? I think not.

That being said, I believe bread should be eaten how it was for centuries. In other words, not from a factory which has mass produced it and pumped it full of preservatives and additives. We need to get back to eating REAL food, and bread is on that list. We need to get back to kneading our own dough, watching it prove and enjoying the reward right out of the oven. I guarantee you, very few things are better than hot fresh bread right out of the oven. Served with it's eternal partner butter is nothing less than ambrosia. If you have never had the courage to try baking your own bread I implore you, have faith and all will be well. It's not as daunting as you may think and the process will actually be quite rewarding, therapeutic even!

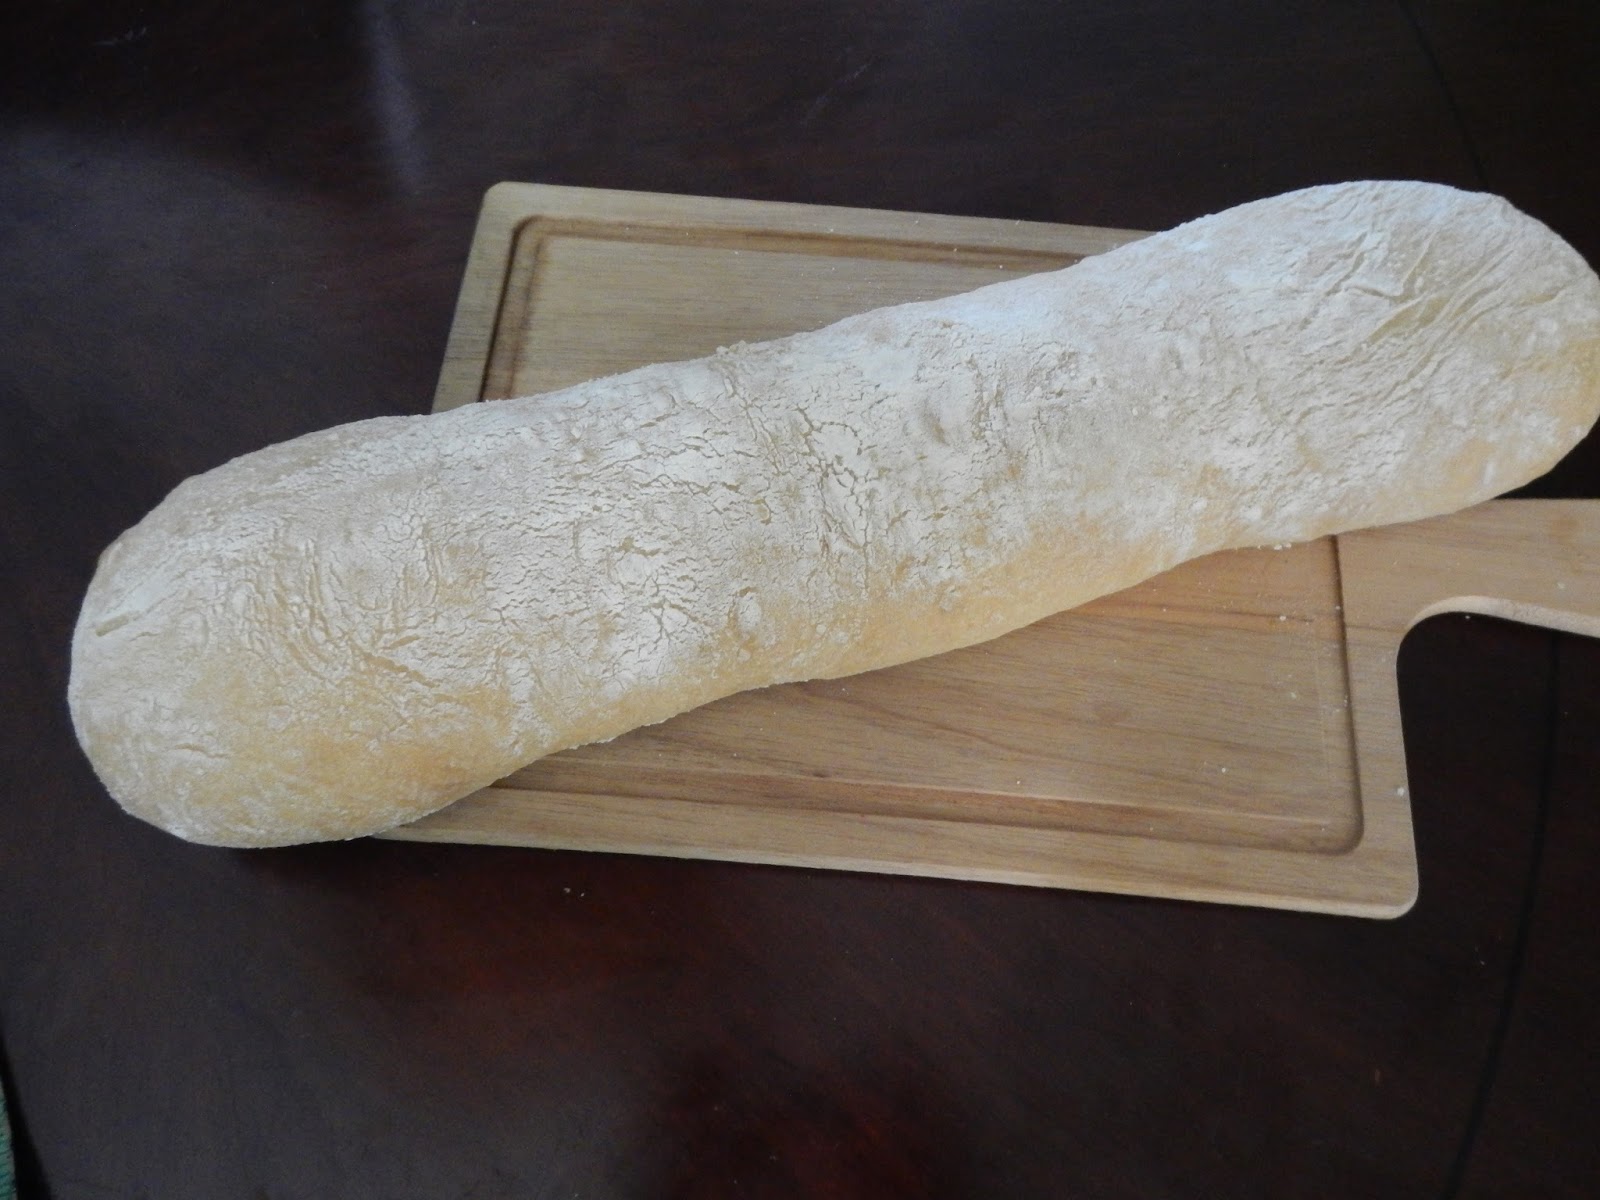
So for my recipe I have chosen a dough I make very week. I purchased Paul Hollywood's book "How to Bake" and have made many breads since and have been nothing short of pleasantly pleased with the results. Now bear in mind this isn't the ciabatta from the corner artisan bakery. It is made in a relatively short time - 3 to 4 hours total so you won't end up with a crumb structure with the holes and extra chewiness that an artisan ciabatta bread produces but you will end up with an extremely moist, crusty bread which will never get hard on you. You will be eating this bread for breakfast for days and I promise you won't break your jaw in the process. This is my main stay recipe for ciabatta and I urge you to try it. Further more, I urge you to purchase the book you will have no regrets.

Now there are a few pointers before you embark on this ciabatta journey. The dough is made with cool water which means the proving time will be slower. This only aids flavour so be patient. The dough is extremely wet so don't even think of kneading it. I make my own using my kitchen aid but it can be done using a bowl and wooden spoon. I also never use all the water called for in the recipe. Hollywood states that you should start by adding 3/4 of the water than adding more as you go along but I almost always just use 3/4 of it alone. So add the water slowly. Don't be scared when you see the dough looking more like paste than dough - that's how it is meant to look and please don't over handle it. It needs minimal handling. So these are my pointers and hopefully you will be on your way to making your own fresh bread. Good luck!

Ciabatta (adapted from Paul Hollywood's book "How To Bake")

500g strong white bread flour, plus extra for dusting
10g salt
10g instant yeast
40ml olive oil
400ml tepid water
Fine semolina for dusting (optional)

1. Lightly oil a 2-3 litre square plastic container. (It's important to use a square tub as it helps shape the dough.)
2. Put the flour, salt and yeast into the bowl of a mixer fitted with dough hook (I use the paddle attachment as I have found it mixes the dough better) Don't put the salt directly on top of the yeast. Add the olive oil and three-quarters of the water and begin mixing on a slow speed. As the dough starts to come together, slowly add the remaining water. Then mix a further 5 - 8 minutes on a medium speed until the dough is smooth and stretchy.
3. Tip the dough into the prepared tub, cover with a tea towel and leave until at least doubled, even trebled in size 1-2 hours or longer. The longer proving time means more flavour.
4. Heat your oven to 220 celcius and line a baking tray with parchment paper.
5. Dust your work surface heavily with flour - add some semolina too, if you have some. Carefully tip out the dough (it will be very wet) onto the work surface, trying to retain a rough square shape. Rather than knocking it back, handle it gently so you keep as much air in the dough as possible. Coat the top of the dough with more flour and/or semolina. Shape the dough into one long shape or two medium loaves. Stretch each piece of dough lengthways  a little and place on prepared tray.
6. Leave the ciabatta dough to rest for a further 10 minutes, then bake for 25 minutes, or until the loaf or loaves sound hollow when tapped on the base and are golden. Cool on a wire rack.


The very wet dough. As you can see it would only be possible to mix in a stand mixer or with a wooden spoon.


The dough after it was shaped and proved for 3 hours. I then left it to prove for another twenty minutes given that my loaf was so large.


The final product...hot out of the oven.


The crumb structure was not the distinctive "holey" structure of ciabatta due to the short proving time. However the bread was very tasty and made it relative ease. The crumb structure was very tender and was gobbled with lashings of butter.