For the past few weeks the rain has been incessant. This kind of weather puts me into a baking mood, so I decided to bake Paul Hollywood's milk bread today. I love milk breads, the crumb is tender as opposed to the chewy texture of a bread made with water. I more often than not choose Italian loaves such as ciabtta or foccacia for my daily loaves but today I felt for the wholesomeness of milk bread.
So I am posting another recipe from Paul Hollywood's "How To Bake", my indispensable guide to bread and baking. I am a Great British Bake Off fanatic....to say the least but I will be posting more on that later. I sometimes hear Paul Hollywood's voice in my head whilst baking and have a good laugh. It usually expresses some sort of opprobrium but then I shake it off and think even Paul Hollywood would be inclined to like what I baked. Well...at least Mary Berry would.
So anyway, here is the recipe. Please give it a go and enjoy it as I enjoyed mine.
Milk Loaf (recipe from Paul Hollywood's "How To Bake")
500g strong white bread flour, plus extra for dusting
10g salt
25g sugar
10g yeast
30g unsalted butter, softened
320ml warm full-fat milk
olive oil for kneading
1. Tip the flour into a large mixing bowl and add the salt and sugar to one side of the bowl and the yeast to the other. Add the butter and three quarters of the milk. At this stage, move the flour around gently with your fingertips. Continue to add the remaining milk, a little at a time, until you've picked up all of the flour from the sides of the bowl. You may not need to add all the milk, or you may need to add a little more - you want a dough that is soft, but not soggy. Use the mixture to clean the inside of the bowl and keep going until it forms a soft dough.
2. Coat the work surface with a little olive oil, then tip the dough onto it and start to knead. Keep kneading for 5 - 10 minutes. Work through the initial wet stage until the dough starts to form a soft, smooth skin. When your dough feels smooth and silky, put it into a lightly oiled large bowl. Cover with a tea towel and leave to rise until at least doubled in size - at least 1 hour, but it's fine to leave it for 2 or even 3 hours.
3. Brush a 1 kg loaf tin with a little olive oil (or you can use melted butter).
4. Tip your dough unto a lightly floured surface. Fold it inwards repeatedly until all the air is knocked out and the dough is smooth. Then form it into an oblong by flattening the dough slightly and folding the sides into the middle. Roll the whole lot up - the top should be smooth with a join running along the length of the base. Put into the prepared tin, making sure the join is underneath. Dust the top lightly with flour and slash lengthways.
5. Put the tin inside a plastic bag and leave to prove for 1 hour, until the dough is at least doubled in size and springs back quickly if you prod it lightly with your finger. Meanwhile, preheat your oven to 210 C.
6. Bake for 25 minutes or until the bread sounds hollow when tapped on the base. Leave to cool, out of the tin, on a wire rack.
Wednesday, 11 September 2013
Tuesday, 10 September 2013
A Greek Classic
I peruse the internet frequently always searching for inspiration, new techniques and all the wonderful offerings it gifts me with. I once made a meal which I laughed about with my best friend because we prepared recipes from different media. One I prepared from a cookbook, the other was from watching a you tube video and the last was from a recipe off a blog. That's life in the 21st century summed up!
So anyway, I was scouring Food And Wine magazine website which I do often enough and I saw a recipe I just had to have. It was a recipe for kourambiedes, which for those not familiar with it is a traditional Greek cookie. I love this cookie and oddly enough, I have never made it yet. I think it's probably because I just end up making French sable cookies or shortbread when I have a hankering for something rich, tender and buttery. That is about to change though.
I have a great recipe for kourambiedes from one of my Greek cookbooks but it includes almonds and my niece has nut allergies so I have decided to go with the Food And Wine recipe. I recommend trying this cookie and storing them in an airtight tin. When you feel that 4 pm hunger pang come on have a cup of tea or coffee and a couple cookies. It should more than hold you out until dinner.
Kourambiedes (recipe from Food And Wine's Grace Parisi)
2 sticks ( 1/2 pound) unsalted butter, softened
1 large egg yolk
2 tablespoons brandy
1 teaspoon pure vanilla extract
2 cups all-purpose flour
3/4 cup confectioners' sugar, plus more for coating
1/2 teaspoon baking powder
1/8 teaspoon ground cloves
Pinch of salt
In a large bowl, using a handheld electric mixer, beat the butter at high speed until light and fluffy, about 10 minutes. Add the egg yolk, brandy and vanilla and beat until smooth.
Sift the flour with 3/4 cup of the confectioners' sugar, the baking powder, cloves and salt. Add the dry ingredients to the butter mixture in 3 batches, beating at low speed just until smooth. Scrape the dough onto a large sheet of plastic wrap or wax paper and roll into a 2-inch log. Wrap and refrigerate until firm, at least 30 minutes or up to 3 days.
Preheat the oven to 325°. Line 2 heavy baking sheets with parchment paper. Unwrap the dough and roll it into a perfect cylinder. Cut it into 3 equal pieces. Slice each piece crosswise into 12 cookies and arrange them on the prepared sheets about 1 inch apart.
Bake the cookies on the top and middle racks of the oven for 20 minutes, or until golden on the bottom; shift the sheets from top to bottom halfway through baking. Let the cookies cool slightly on the sheets, about 15 minutes.
Pour confectioners' sugar into a large shallow bowl. Add the warm cookies in batches and heavily coat the tops and sides. Transfer to a sheet of wax paper that has been dusted with confectioners' sugar and let cool.
MAKE AHEAD The cookies can be stored in an airtight tin between layers of wax paper for up to 2 weeks.


These cookies were so buttery and favourful. The brandy flavour was redolent and I think it's a new favourite. Bear in mind that I am extremely gluttonous and impatient so I didn't wait too long for the dough to chill. I measured my cookie dough into tablespoonfuls and rolled them into balls then baked for 25 minutes.


Perfect with afternoon tea or coffee.
Sunday, 8 September 2013
The Iconic Italian Flatbread
Today is Sunday, the day of the week I usually dedicate to bread making. I generally bake ciabatta but since I've commenced this blog I want to introduce my readers to more exceptional breads. Today I have chosen my indispensable recipe for rosemary foccacia.
A few years ago I purchased Michele Scicolone's Italian food Bible "1000 Italian Recipes". It has been a reference guide to regional Italian food ever since. Now bear in mind, I own many cookbooks to the point of an addiction. So I have my share of Italian cookbooks in my repertoire. I particularly adore Marcella Hazan's "Essentials Of Classic Italian Cooking" as it was my first cookbook on one of my favourite cuisines. My book is now worn and weathered but I can proudly affirm that it was an investment that yielded many returns. I am obsessed with most things Italian. In fact, I sometimes joke with my brother in law that I am Italian in soul at least.
Michele Scicolone's book was a joy to behold as it contained 1000 recipes! One of the first foods I tried from that book was the foccacia recipe and it is really reliable. It was a bit odd to find that it contained milk but as Scicolone explained the milk adds a tender touch to the bread's crumb structure. So what you end up with is a bread that will last a few days well without becoming tough and unpalatable. I make this recipe but without the added onions. Sometimes however, if I know the bread will be devoured in a matter of hours by company I will include the onions. So it's entirely up to you whether you want to include it or not. Either way, you're a winner.
This is the iconic flatbread of Italy and I think no other bread celebrates extra virgin olive oil as this bread. So remember to be liberal with the olive oil. I don't go to liberal on the rosemary as I find it is a very intense flavour. So if you appreciate rosemary then you can add more. When making the indentations to the dough always remember to indent the dough heavily with brute force. In fact I go all the way down to create holes all the way through. You will end up with very pronounced pebbling which I think is the hallmark of foccacia. This bread is wonderful hot or at room temperature. Good luck and enjoy!
Red Onion Focaccia Flatbread (from 1000 Italian Recipes written by Michele Scicolone.
1 envelope (21/2 teaspoons) active dry yeast or instant yeast
1/2 cup warm water(100 to 110 degrees farenheit)
1 1/2 cups milk, at room temperature
6 tablespoons olive oil
About 5 cups unbleached all purpose flour
2 tablespoons finely chopped fresh rosemary
2 teaspoons salt
1/2 cup coarsely chopped red onion
1. In a medium bowl, sprinkle the yeast over the warm water. Let stand until the yeast is creamy, about 2 minutes. Stir until the yeast dissolves. Add the milk and 4 tablespoons of the oil and stir to combine.
2. In a large heavy duty mixer or a food processor, stir together the flour, rosemary, and salt. Add the yeast mixture and stir until a soft dough forms. Knead until smooth and elastic, about 3 to 5 minutes. The dough will be sticky.
3. Oil a large bowl. Scrape the dough into the bowl and cover it with plastic wrap. Let rise in a warm, draft-free place until doubled, about 1 1/2 hours.
4. Oil a 13*9*2-inch baking pan. Scrape the dough into the pan, spreading it out evenly. Cover with plastic wrap and let rise 1 hour or until doubled in bulk.
5. Place the oven rack in the center of the oven. Preheat to 450 degrees farenheit.
6. With your fingertips, press down firmly into the dough to make dimples about 1 inch part and 1/2 inch deep. Drizzle the surface with the remaining 2 tablespoons olive oil and scatter the onion slices on top. Sprinkle with coarse salt. Bake until crisp and golden brown, about 25 to 30 minutes.
7. Slide the foccacia onto a wire rack to cool. Cut into squares. Serve warm or at room temperature. Store at room temperature wrapped in foil up to 24 hours.
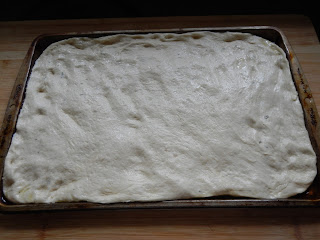
This was the dough after it had proved for 1 1/2 hours. I stretched it into the oiled pan then left it to prove for another 45 minutes.
 The finished focaccia.


Rosemary focaccia sprinkled with coarse sea salt.
A few years ago I purchased Michele Scicolone's Italian food Bible "1000 Italian Recipes". It has been a reference guide to regional Italian food ever since. Now bear in mind, I own many cookbooks to the point of an addiction. So I have my share of Italian cookbooks in my repertoire. I particularly adore Marcella Hazan's "Essentials Of Classic Italian Cooking" as it was my first cookbook on one of my favourite cuisines. My book is now worn and weathered but I can proudly affirm that it was an investment that yielded many returns. I am obsessed with most things Italian. In fact, I sometimes joke with my brother in law that I am Italian in soul at least.
Michele Scicolone's book was a joy to behold as it contained 1000 recipes! One of the first foods I tried from that book was the foccacia recipe and it is really reliable. It was a bit odd to find that it contained milk but as Scicolone explained the milk adds a tender touch to the bread's crumb structure. So what you end up with is a bread that will last a few days well without becoming tough and unpalatable. I make this recipe but without the added onions. Sometimes however, if I know the bread will be devoured in a matter of hours by company I will include the onions. So it's entirely up to you whether you want to include it or not. Either way, you're a winner.
This is the iconic flatbread of Italy and I think no other bread celebrates extra virgin olive oil as this bread. So remember to be liberal with the olive oil. I don't go to liberal on the rosemary as I find it is a very intense flavour. So if you appreciate rosemary then you can add more. When making the indentations to the dough always remember to indent the dough heavily with brute force. In fact I go all the way down to create holes all the way through. You will end up with very pronounced pebbling which I think is the hallmark of foccacia. This bread is wonderful hot or at room temperature. Good luck and enjoy!
Red Onion Focaccia Flatbread (from 1000 Italian Recipes written by Michele Scicolone.
1 envelope (21/2 teaspoons) active dry yeast or instant yeast
1/2 cup warm water(100 to 110 degrees farenheit)
1 1/2 cups milk, at room temperature
6 tablespoons olive oil
About 5 cups unbleached all purpose flour
2 tablespoons finely chopped fresh rosemary
2 teaspoons salt
1/2 cup coarsely chopped red onion
1. In a medium bowl, sprinkle the yeast over the warm water. Let stand until the yeast is creamy, about 2 minutes. Stir until the yeast dissolves. Add the milk and 4 tablespoons of the oil and stir to combine.
2. In a large heavy duty mixer or a food processor, stir together the flour, rosemary, and salt. Add the yeast mixture and stir until a soft dough forms. Knead until smooth and elastic, about 3 to 5 minutes. The dough will be sticky.
3. Oil a large bowl. Scrape the dough into the bowl and cover it with plastic wrap. Let rise in a warm, draft-free place until doubled, about 1 1/2 hours.
4. Oil a 13*9*2-inch baking pan. Scrape the dough into the pan, spreading it out evenly. Cover with plastic wrap and let rise 1 hour or until doubled in bulk.
5. Place the oven rack in the center of the oven. Preheat to 450 degrees farenheit.
6. With your fingertips, press down firmly into the dough to make dimples about 1 inch part and 1/2 inch deep. Drizzle the surface with the remaining 2 tablespoons olive oil and scatter the onion slices on top. Sprinkle with coarse salt. Bake until crisp and golden brown, about 25 to 30 minutes.
7. Slide the foccacia onto a wire rack to cool. Cut into squares. Serve warm or at room temperature. Store at room temperature wrapped in foil up to 24 hours.

This was the dough after it had proved for 1 1/2 hours. I stretched it into the oiled pan then left it to prove for another 45 minutes.


Rosemary focaccia sprinkled with coarse sea salt.
Monday, 2 September 2013
Cooking With Children In Mind
I am a mother to a two year old boy and I have to constantly create dishes which will appeal to his picky toddler palate. I am always met with much effusiveness when he is presented with potatoes, he adores potatoes in very form. A loaded potato with butter and cheese being his top choice followed by french fried and mashed.
Don't get me wrong, my son appreciates most foods. He is though a very small eater so he will eat most things I cook but in a very small amount. Given his predilections, I always try to expand his palate for other foods. I was pleasantly surprised to see him try sushi and eat it with gusto (cooked rolls that is). I made Indian food a few months ago and saw him devour chicken korma and naan even though I cooked with some heat that day. So that being said I am always amused when he partakes of whatever repast I create.
Yesterday I prepared pasta elbows with broccoli, chicken and cheese. I tried to cook it as healthy as I can meaning not in the alfredo style with lashings of cream. So i made it using a technique I always resort to when I want something with the unctuousness of an alfredo sauce but with a fraction of the calories. I achieve this by adding a touch of half and half or evaporated milk at the end of cooking. This makes the dish taste creamy without adding cream. There are many things you can add to the end of cooking that enhances the final dish. Sugar, salt, pepper, lemon juice, red wine vinegar, fresh herbs and cream or butter are the usual suspects. These all add that finishing touch to the dish and would have become lost had they been added at the beginning. Which is why cooking is a tasting process from start to finish.
So I hope this recipe will be of some use to mothers out there who constantly rack their tired brains with feeding options for their children. Believe me, the adults will enjoy it as well.
Elbow Pasta With Broccoli And Chicken
Now before I proceed bear in mind that this is a rough guide to preparing this dish. I have listed ingredients based on my taste so feel free to add or lessen according to your taste.
Ingredients
400g elbow pasta
3 boneless skinless chicken breasts
3 tbsp extra virgin olive oil
Salt and pepper to taste
1 cup mozzarella cheese (not the fresh one as it has too much moisture)
1 cup parmesan cheese ( I always use the real thing ..pamigiano reggiano)
6 cloves of minced garlic
2 bunches of broccoli cut into florets
1/3 to 1/2 scant cup of evaporated milk or half and half
Pinch of nutmeg
Chopped fresh herbs such as thyme or parsley
1. Cut the chicken into tiny strips and season well with salt and pepper. Heat a large pot of water to a rolling boil. Once water has come to a boil add salt liberally. Also heat a medium skillet over medium high heat. Once the water is boiling add the pasta and time it for about 8 to 9 minutes.
2. Once the skillet is heated to required heat saute the chicken in the olive oil. Try not to keep stirring the chicken so that it can get some time to brown properly.Once chicken is browned add the garlic and broccoli florets. Cover the pan and turn the heat down to medium low and let the mixture cook until the broccoli is the desired tenderness.
3.Before draining the pasta reserve some of the pasta cooking liquid. I always keep about a cup's worth. Once the pasta has been drained add it to the skillet with chicken and broccoli. Stir well and reduce the heat to low. Add the cheeses and black pepper to taste and add the dairy a little at a time until you like the consistency. Grate a bit of nutmeg and add a pinch of sugar and more salt if it needs it. You can also at this point add a little of the pasta cooking liquid. Taste and adjust seasonings until you are happy and enjoy!

One pot pasta elbows with chicken and broccoli.

Don't get me wrong, my son appreciates most foods. He is though a very small eater so he will eat most things I cook but in a very small amount. Given his predilections, I always try to expand his palate for other foods. I was pleasantly surprised to see him try sushi and eat it with gusto (cooked rolls that is). I made Indian food a few months ago and saw him devour chicken korma and naan even though I cooked with some heat that day. So that being said I am always amused when he partakes of whatever repast I create.
Yesterday I prepared pasta elbows with broccoli, chicken and cheese. I tried to cook it as healthy as I can meaning not in the alfredo style with lashings of cream. So i made it using a technique I always resort to when I want something with the unctuousness of an alfredo sauce but with a fraction of the calories. I achieve this by adding a touch of half and half or evaporated milk at the end of cooking. This makes the dish taste creamy without adding cream. There are many things you can add to the end of cooking that enhances the final dish. Sugar, salt, pepper, lemon juice, red wine vinegar, fresh herbs and cream or butter are the usual suspects. These all add that finishing touch to the dish and would have become lost had they been added at the beginning. Which is why cooking is a tasting process from start to finish.
So I hope this recipe will be of some use to mothers out there who constantly rack their tired brains with feeding options for their children. Believe me, the adults will enjoy it as well.
Elbow Pasta With Broccoli And Chicken
Now before I proceed bear in mind that this is a rough guide to preparing this dish. I have listed ingredients based on my taste so feel free to add or lessen according to your taste.
Ingredients
400g elbow pasta
3 boneless skinless chicken breasts
3 tbsp extra virgin olive oil
Salt and pepper to taste
1 cup mozzarella cheese (not the fresh one as it has too much moisture)
1 cup parmesan cheese ( I always use the real thing ..pamigiano reggiano)
6 cloves of minced garlic
2 bunches of broccoli cut into florets
1/3 to 1/2 scant cup of evaporated milk or half and half
Pinch of nutmeg
Chopped fresh herbs such as thyme or parsley
1. Cut the chicken into tiny strips and season well with salt and pepper. Heat a large pot of water to a rolling boil. Once water has come to a boil add salt liberally. Also heat a medium skillet over medium high heat. Once the water is boiling add the pasta and time it for about 8 to 9 minutes.
2. Once the skillet is heated to required heat saute the chicken in the olive oil. Try not to keep stirring the chicken so that it can get some time to brown properly.Once chicken is browned add the garlic and broccoli florets. Cover the pan and turn the heat down to medium low and let the mixture cook until the broccoli is the desired tenderness.
3.Before draining the pasta reserve some of the pasta cooking liquid. I always keep about a cup's worth. Once the pasta has been drained add it to the skillet with chicken and broccoli. Stir well and reduce the heat to low. Add the cheeses and black pepper to taste and add the dairy a little at a time until you like the consistency. Grate a bit of nutmeg and add a pinch of sugar and more salt if it needs it. You can also at this point add a little of the pasta cooking liquid. Taste and adjust seasonings until you are happy and enjoy!
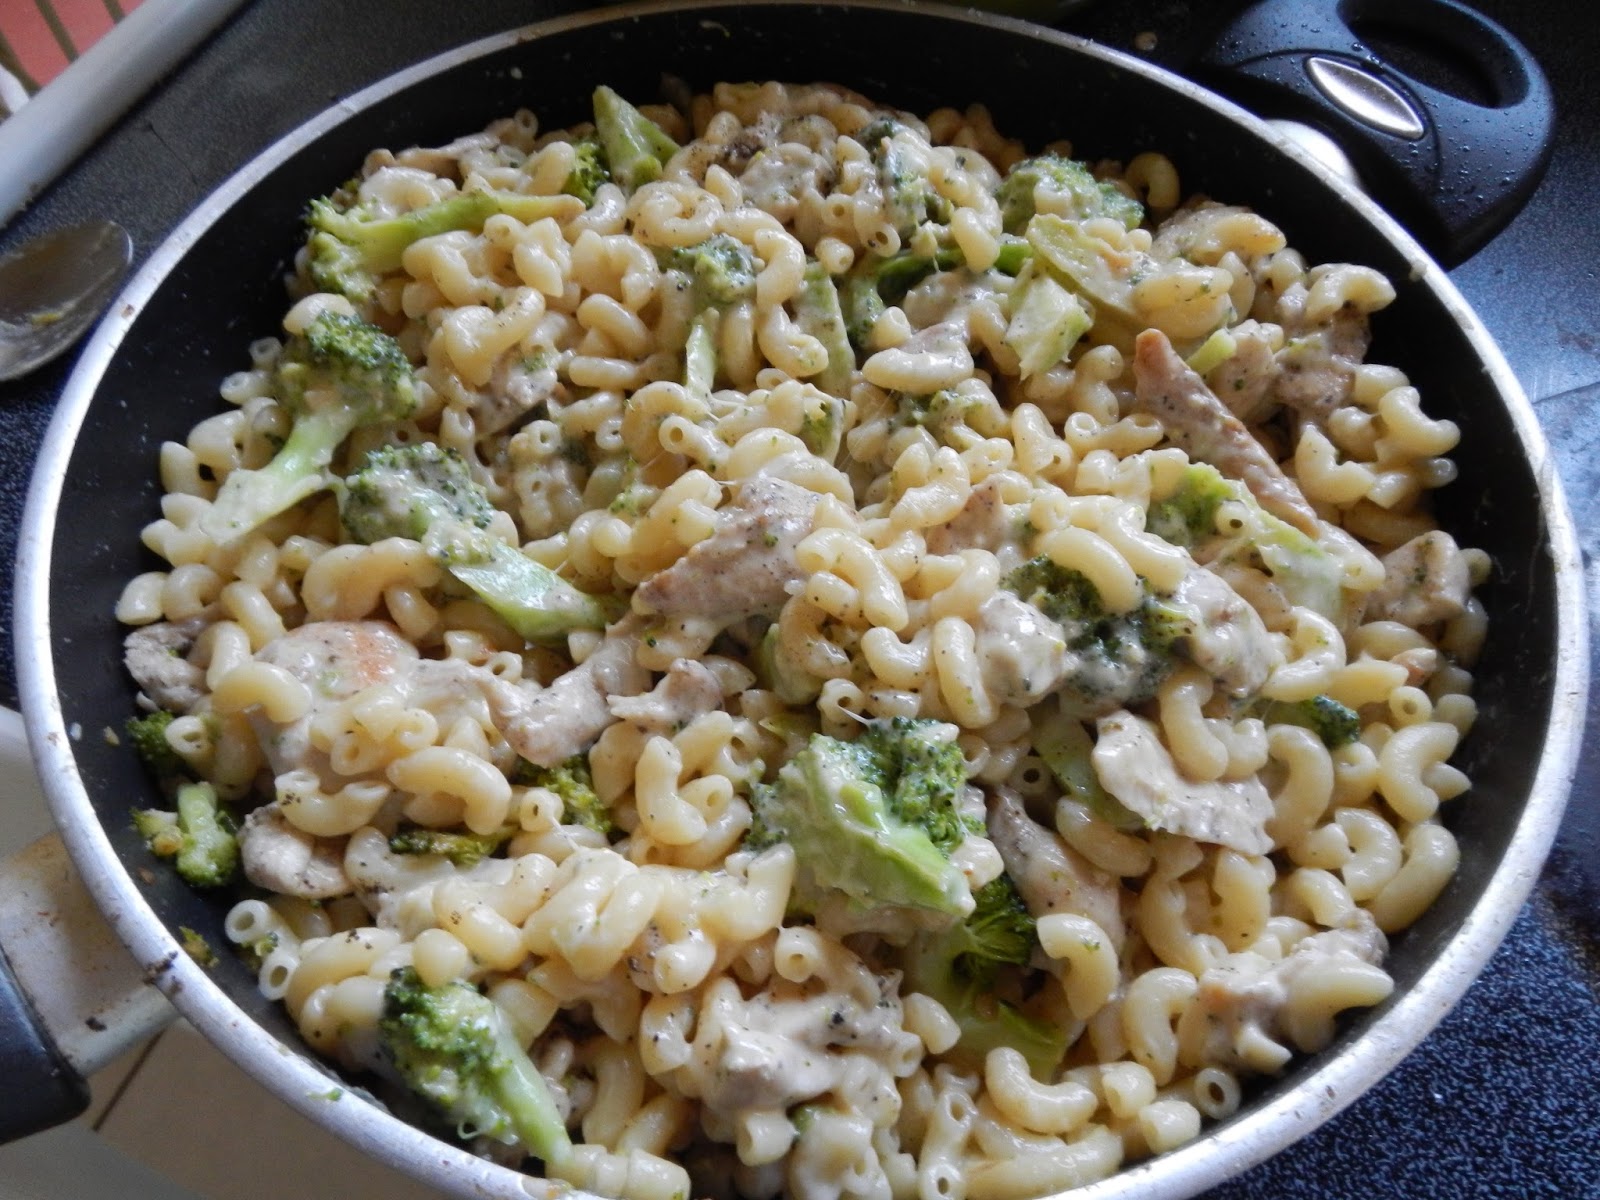
One pot pasta elbows with chicken and broccoli.

Subscribe to:
Posts (Atom)